Kettles
Kettle Elements
Manley used three different types of heating elements for their
kettles--internal, ring, and Cartridge.
The Manley M-line generally used an internal element. Here is the
bottom of the kettle from an M-47:
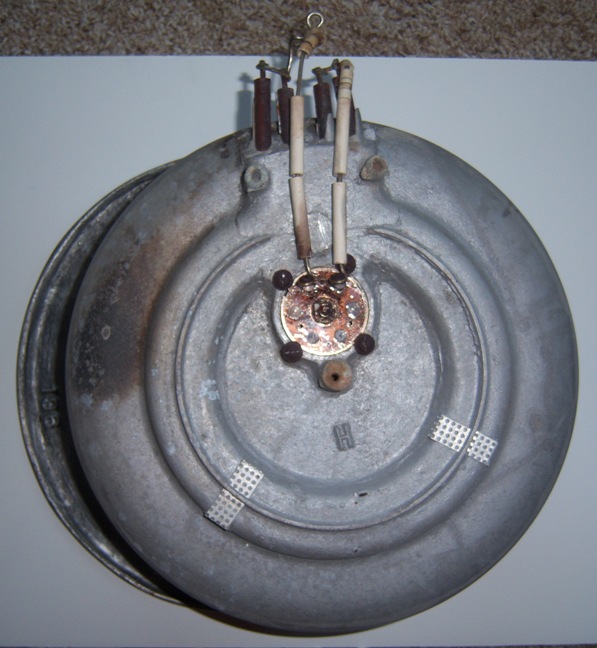
You will note that this kettle has two sets of internal heating elements.
The Premier models tended to use ring heaters. Ring heaters are
bolted onto the kettle, and are therefore, a separate piece. In some
cases the two ring heaters are combined as one piece or in other cases they
are two separate ring heaters. The following photo is from a Premier
model:
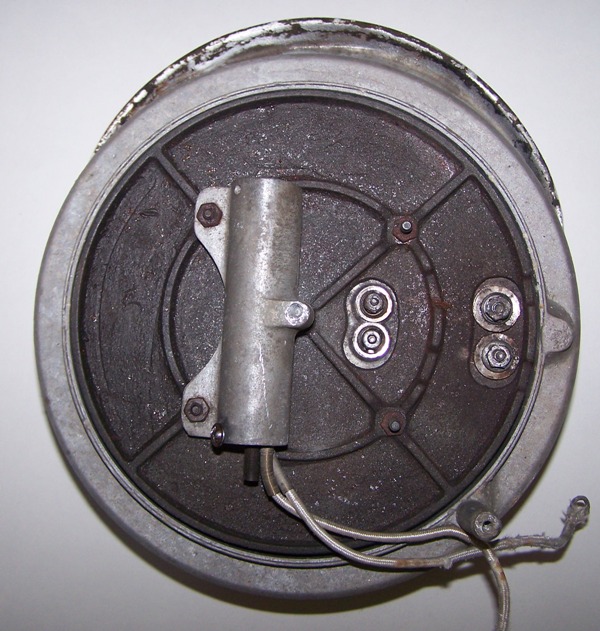
Note that the wires have been removed from this kettle. I removed
the wires as part of the restoration process as the insulation on the high
temperature wire failed, shorting out the kettle. The ring heaters
were still good.
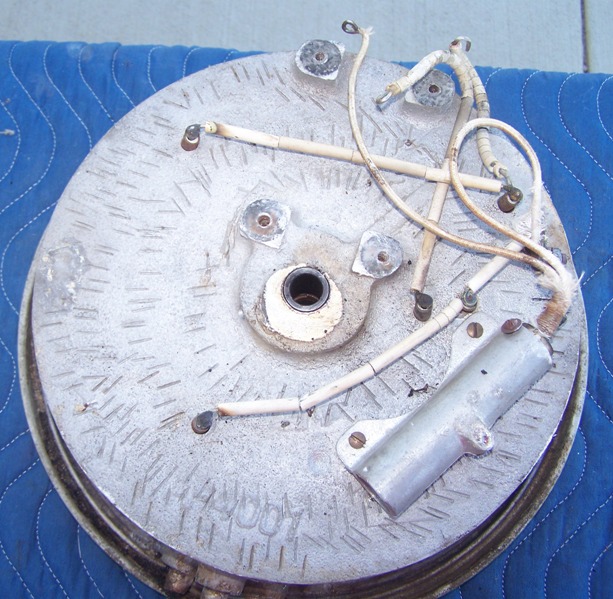
Typically, the Aristocrat kettle used three sets of internal elements.
Two of the sets of elements are wired together allowing separate control of
two different sets elements. Having one set on was low heat, the other
set on is medium heat, and both sets on is high heat. This provided
more control over the temperature of the kettle. Even though three
wires (black, red, and white) go to the kettle, it is only a 110 volt
kettle. Here is the bottom of a Manley Aristocrat kettle:
The third style of element is the cartridge. Again with this style
the heating element is separate from the kettle itself. Below is a
photo of the kettle bottom from a Model 128 Vista Pop:
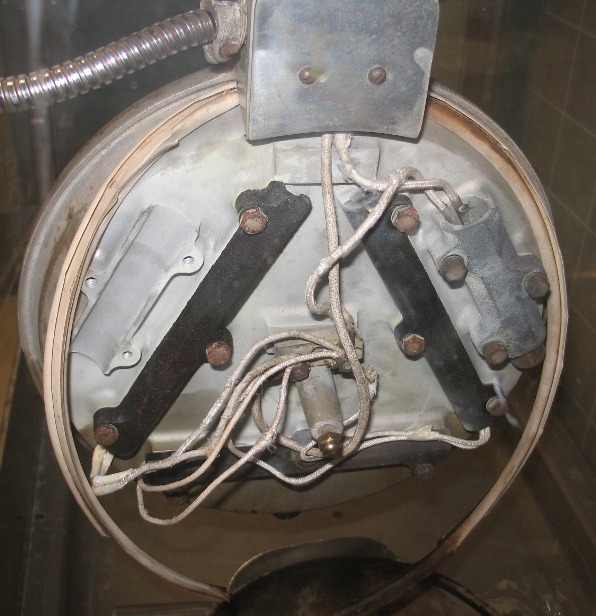
Note in this case that three separate cartridge elements are used on the
Manley kettle.
Thermostats
Manley used two different types of thermostats on their kettles.
Typically, the M-line used a 3/4" snap disk thermostat, while the Premier,
Aristocrat, and Vista Pop used cartridge style thermostats.
Specifically, the thermostats served as a high limit switch. When the
temperature of the kettle became too hot, the thermostat would open to
"turn-off" the elements until the kettle cooled to an acceptable
temperature. Therefore, these thermostats would be open on rise
thermostats.
You want the temperature of your kettle to be around 450°
F for your corn to pop correctly. However, you do not want your kettle
to reach the flash point of coconut oil (or other oils) used for popping the
corn. The flash point of coconut oil is around 550° F.
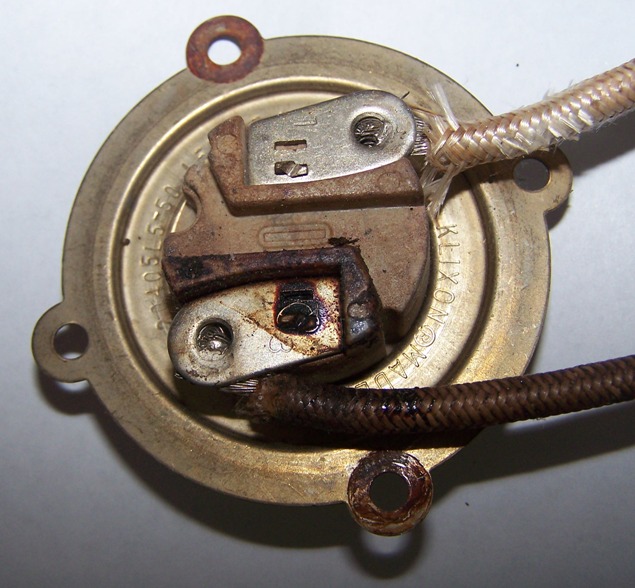
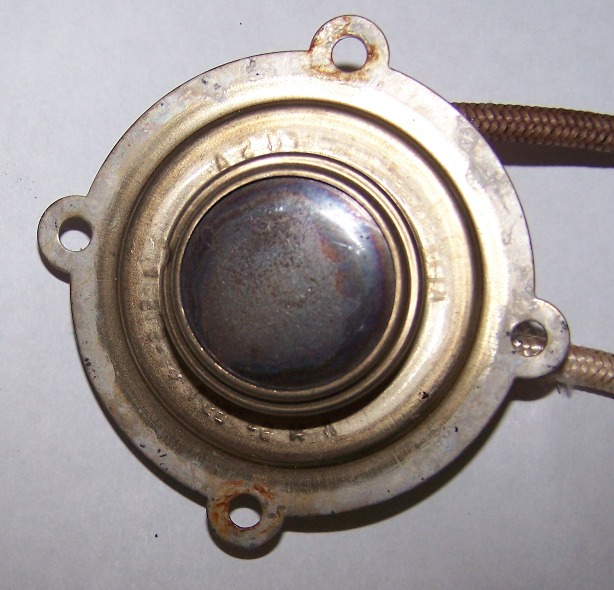
Here is a thermostat from an M-47 kettle:
Here is a cartridge thermostat from a Premier model:
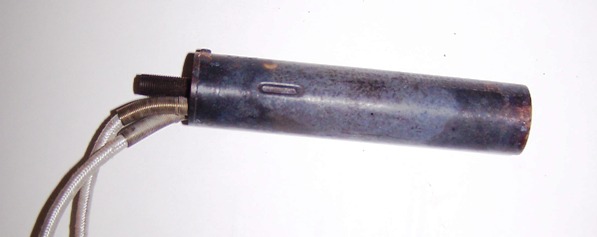
There is a set screw on the end that can adjust the temperature of the
cartridge thermostat.
Testing Kettle
The good news is that kettles made with internal elements are almost
indestructible. On the other hand kettles made with ring or cartridge
heater are not as indestructible as the internal elements kettles, but
replacement parts can be found.
In many cases the last thing to go is the heating element itself.
Your first step should be to determine that power is reaching the kettle.
When you are dealing with 50-60 year old wire, it is likely that the
insulation has become brittle and part of the insulation may be missing.
Obviously this leads to shorts. Not to mention that wire insulation
from this period tends to get attacked by rodents. They tend to find
this wire insulation tasty. :)
The next step is to perform a continuity test on the total kettle.
If you are not familiar with a continuity test,
try this link. This can be done with the kettle shroud in place
and conducting the test across the thermostat and kettle elements. If
you have continuity, the kettle is probably fine.
If the continuity test fails, you need to test the thermostat and
kettle elements separately. To do this you must remove the shroud from
the kettle to get to the kettle wiring. The kettle elements are wired
in parallel, with the thermostat in series with the elements. You
should perform a continuity test on both the thermostat and the kettle
elements. You will need to remove the lead wire from the thermostat
that is attached to the kettle elements. With this lead wire removed
you can now perform a continuity test on the thermostat and then on the
kettle elements. If you have continuity on the both parts, then you
kettle should be good. If either fails then that part is defective.
Remember the thermostat is an open on rise (open on rise in temperature)
style and should have continuity at room temperature.
Common Problem
The more common problems are not the elements, but getting electrical
current to the kettle. The wiring has already been mentioned.
But another common problem is the switches themselves. It is
common to have a switch that has failed.
Obviously this could prevent power from reaching the kettle.
Another common problem, especially on the Premier models is that the high
temperature wire has failed within the kettle. I have two premier
kettles and in both cases the elements were good, but the insulation on the
high temperature wire had failed and shorted the kettle. Replacement
of the high temperature wire in the kettle (under the shroud) should put the
kettle back in operation.
Replacement Parts
If the internal elements on the kettle are burned out, you will need a
replacement kettle. It will have to be a salvaged kettles as replacement
kettles are not available. If you have ring heaters or cartridge heaters,
you can find replacement pats.
For thermostats, the 3/4" high temperature snap disc thermostats are not
made any more (if someone finds a source please let me know). However,
1/2" high temperature snap disc thermostats are made today. I think it
would be possible to make a mounting bracket for one of these. The
cartridge thermostats are still made.
Cautions
Remember you are dealing with electrical wiring and using it to heat the
kettle to around 450 degrees. Please exercise appropriate precautions.